Create New Test Case
Video Guideline
Video - How to create test cases
The Create / Edit Test Case page allows users to create a new test case or modify an existing one by managing its details, test steps, actions, attachments, versions, and other related information.
- Create Test Case: Used to define a new test case by entering details such as the title, description, labels, priority, test steps, expected results, attachments, and other relevant information.
- Edit Test Case: Used to update an existing test case by modifying its details, adding or removing steps, updating actions, changing attachments, or revising any other information as the application or requirements change.
- Create Test Case in zAI Mode: It allows users to create a new test case using the zAI assistant. By providing a prompt or describing the testing scenario in natural language, zAI generates the test case title, test steps, actions, expected results, and other relevant details, reducing manual effort and speeding up test case creation.
Why it matters / Use Cases:
- Ensures complete test coverage by allowing teams to create test cases for new features, enhancements, and bug fixes.
- Provides a structured testing process by organizing test steps, expected results, and other test details in a single location.
- Supports both manual and automated testing by creating reusable test cases that can be executed manually or automated later.
- Reduces manual effort by allowing users to create test cases quickly using zAI or by reusing existing test steps.
- Keeps test cases up to date by allowing users to edit and maintain them as application requirements change.
- Encourages reusable test design by enabling users to create modular and maintainable test cases that can be updated and reused across multiple test cycles.
Prerequisites
- Access to ZeuZ Server with permissions for Testing → Test Case → Create / Edit.
- A project must already exist in ZeuZ.
- A folder or feature should be available to organize the test case.
- If using zAI Mode, the AI assistant must be enabled, and the user should provide a clear prompt or testing scenario to generate accurate test cases.
- If attachments are required, the relevant files should be available before uploading them to the test case.
- The necessary test information, such as the test objective, test steps, and expected results, should be prepared before creating or editing a test case.
Quick-Start
- To create a test case manually, click the Switch to Create Mode button.
- To edit a test case, select the desired test case on the "Create New Test Case" page, then click the Create button.
Features
- Click the Switch to Create Mode button, then navigate to the "Create New Test Case" page.
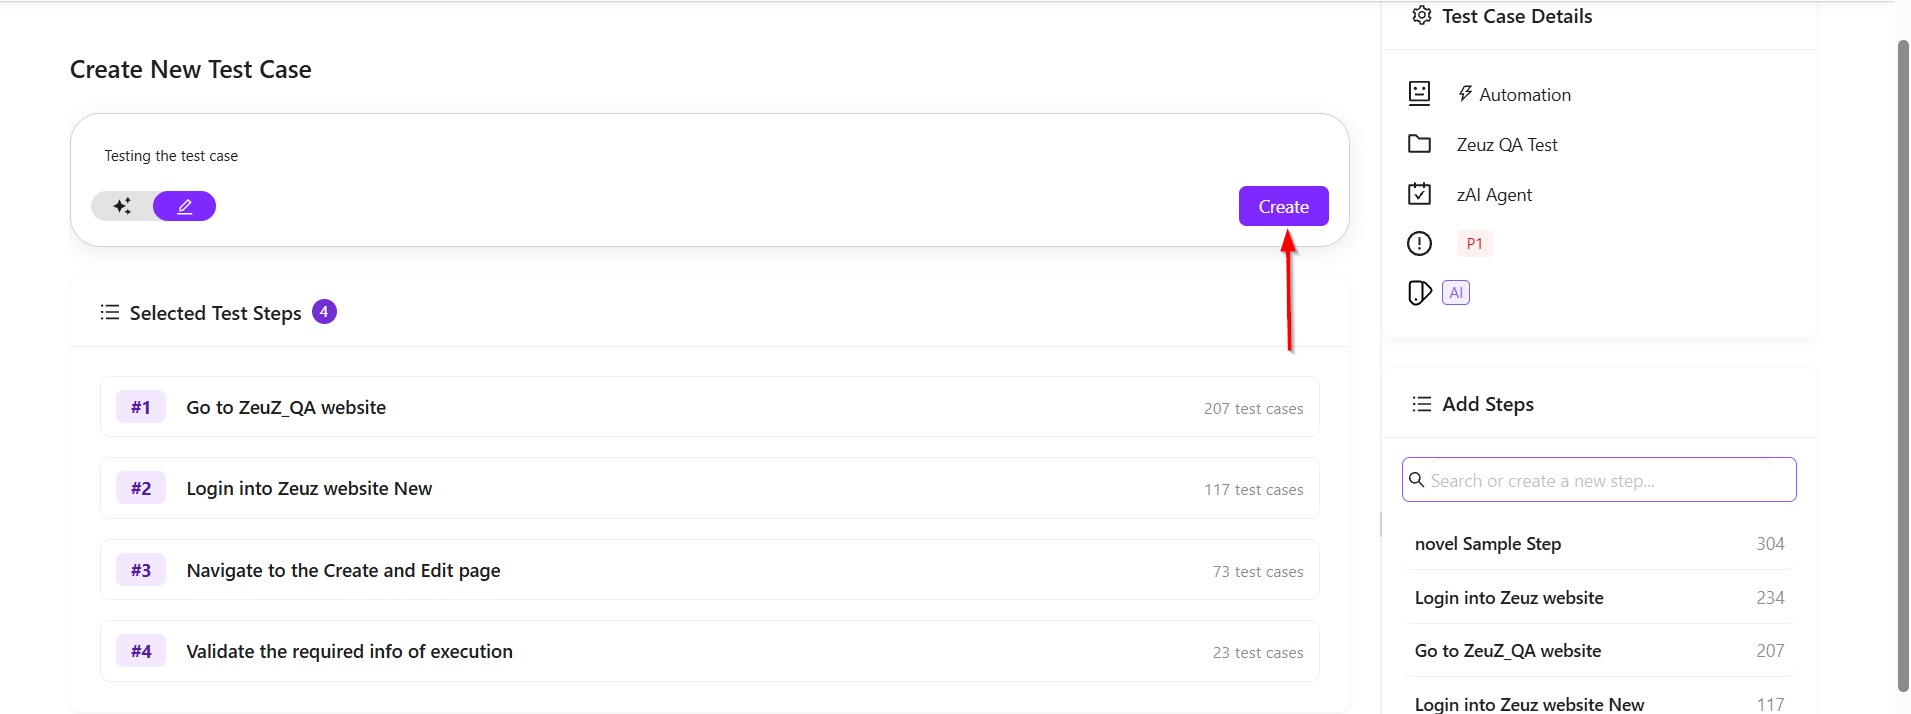
- After navigating to the "Create New Test Case" page, fill in the following fields.
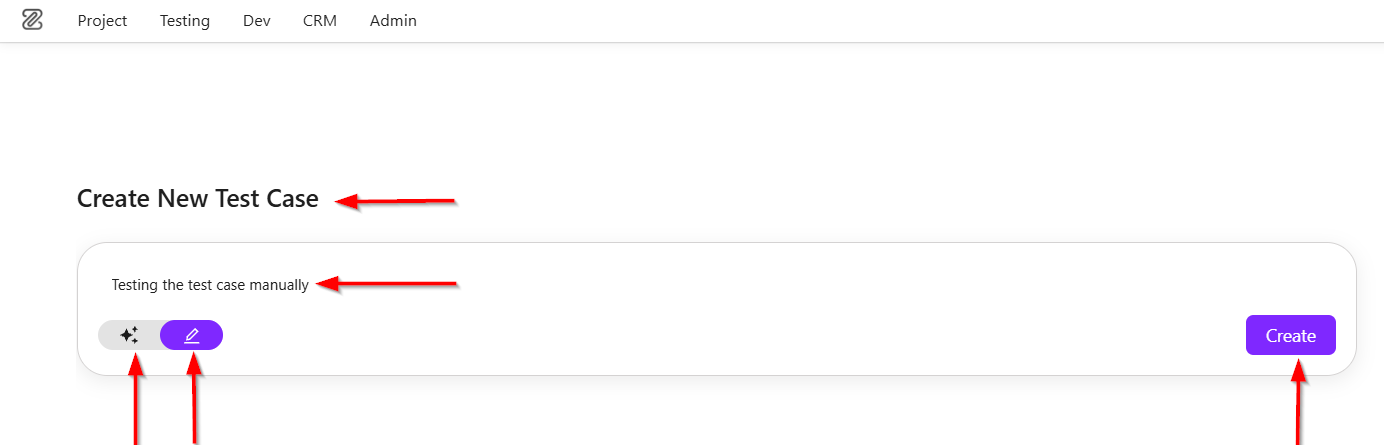
- Test Case Title: A text input field with the placeholder "Enter test case title..." where users can enter the title of the new test case.
- Creation Mode Selector: The creation mode selector, located at the bottom-left of the input field, allows users to switch between the following modes:
- Switch to zAI Mode: It allows users to switch from the manual test case creation interface to the AI-assisted test case creation interface.
- Create Mode: It allows users to manually create a new test case by entering the required details.
- Create Button: Creates the new test case after a valid test case title has been entered.
- To create a test case manually, first enter the test case title.
- Next, fill in the following Test Case Details.
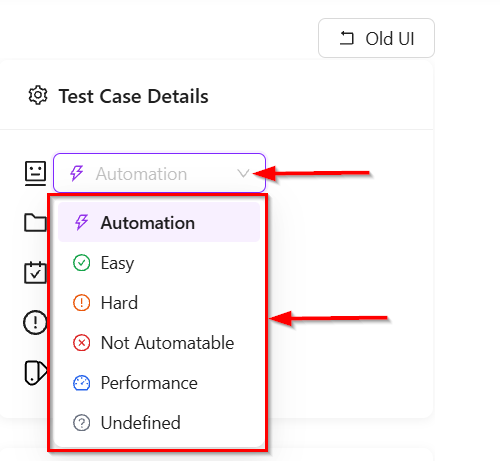
- Expand the Automation drop-down menu, then select the appropriate automation type for the test case, such as Automation, Easy, Hard, Not Automatable, Performance, or Undefined.
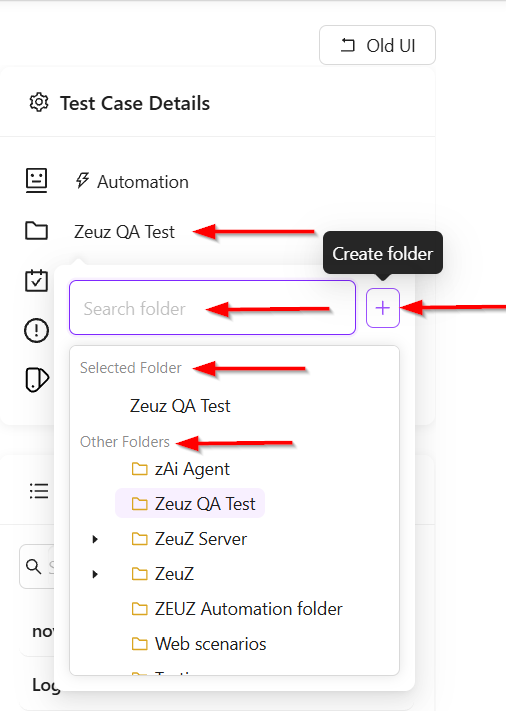
- Click the Folder selection panel in the Test Case Details section. The panel allows users to search for, select, and create folders to organize test cases. It contains the following elements:
- Search folder
- Create folder
- Selected Folder
- Other Folders.
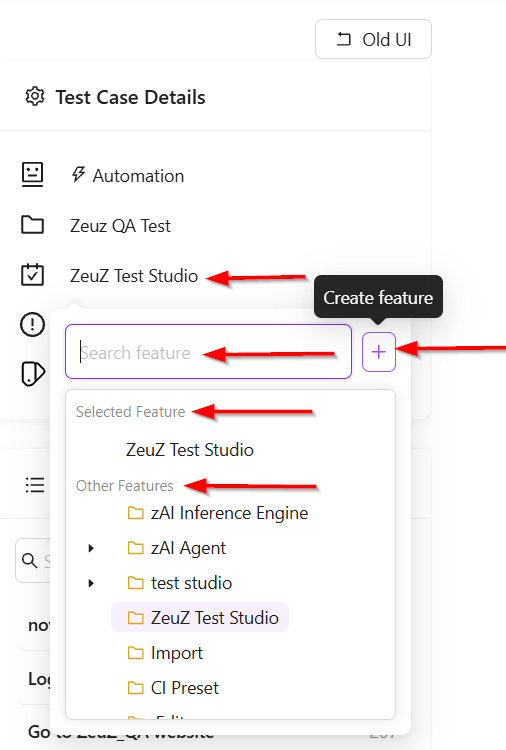
- Click the Feature selection panel in the Test Case Details section. The panel allows users to search for, select, and create features to organize and categorize test cases. It contains the following elements:
- Search feature
- Create feature
- Selected Feature
- Other Features.
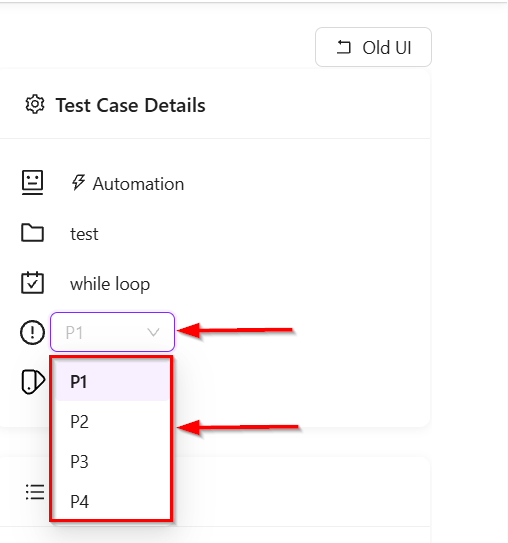
- Click the Priority section in the Test Case Details panel. This section allows users to assign a priority level to a test case based on its importance and execution urgency. The drop-down menu contains the following priority levels:
- P1 (Highest Priority)
- P2 (Medium-High Priority)
- P3 (Medium Priority)
- P4 (Lowest Priority).
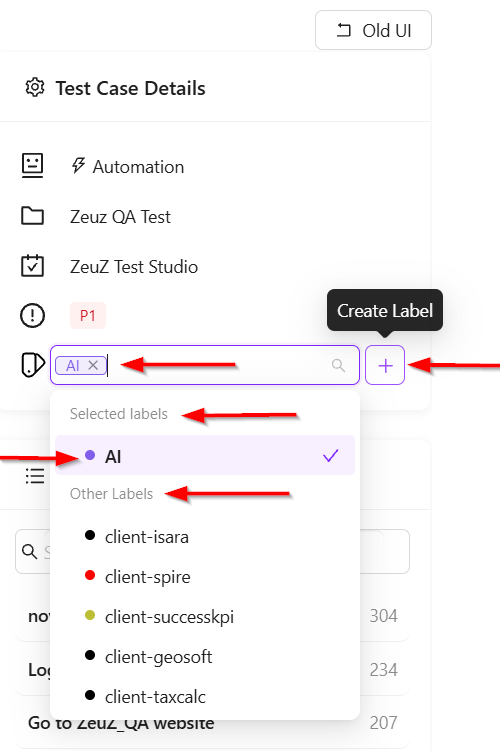
- Click the Labels section in the Test Case Details panel. This section allows users to search for, select, and create labels to categorize and organize test cases. It contains the following elements:
- Search labels
- Create Label
- Selected labels
- Other Labels
- Color indicators.
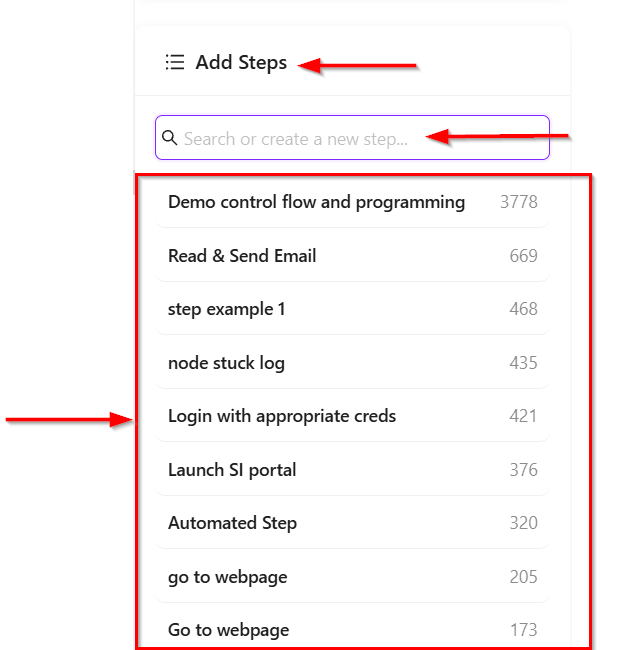
- Steps can be added by searching in the Add Steps section.
- Users can also create new steps in the Add Steps section and add them to the test case.
- The steps added to the test case are displayed under the test case.
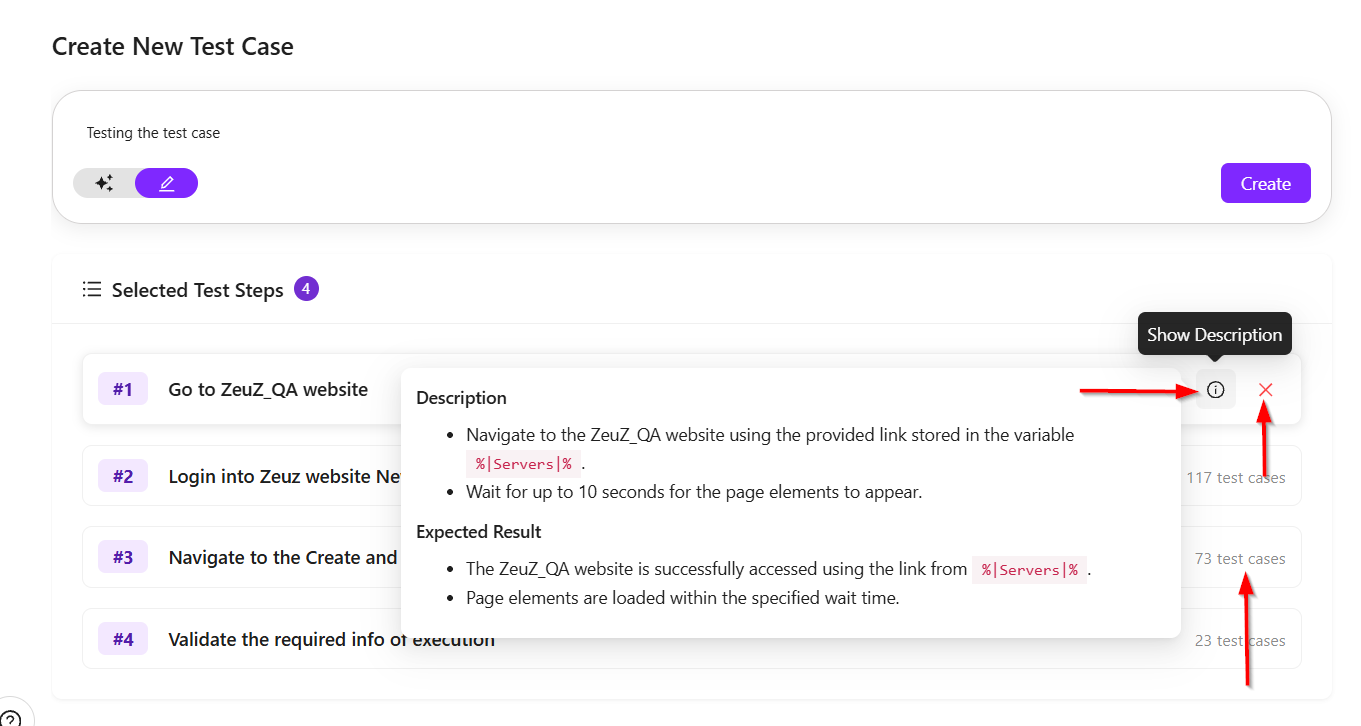
- The Selected Test Steps section lists all the test steps that have been added to the test case. It displays the following elements:
- Displays the total number of test steps currently included in the test case.
- Identifies the position of the test step within the test case.
- Displays the title of the selected test step.
- Displays the number of test cases that currently use the selected test step.
- Clicking the information (i) icon displays the description and expected result associated with the selected test step, allowing users to review additional details without opening the step.
- Clicking the Remove Step button removes the selected test step from the current test case.
- After filling in all the required details, click the Create button. The system then redirects the user to the "Test Case Edit" page.
- A notification message stating "Test case created successfully" is also displayed.
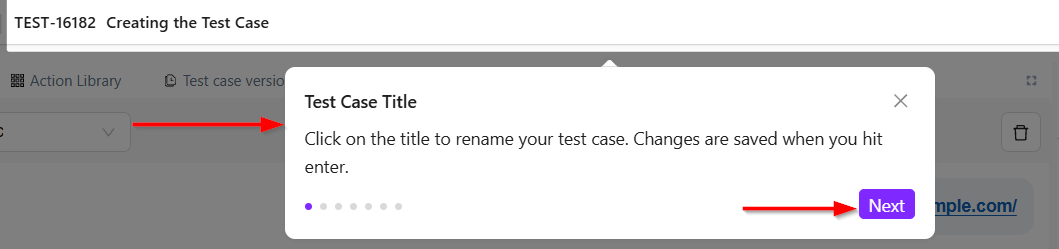
- After navigating to the "Test Case Edit" page, a guideline is displayed at the beginning of the test case.
Main Components
- Test Case Header: Located at the top of the page, the header displays the following elements:
- Test Case ID
- Test Case Title
- Run on Deploy
- Run on Debug
- ZAI Chat
- Save test case version
- Switch to Old UI
- Worklog
- Layout Settings.

Details Panel
- The left panel displays the test case information, including:
- Status
- Automatability
- Priority
- Set
- Folder
- Feature
- Label
- Pre-requisite
- Description.
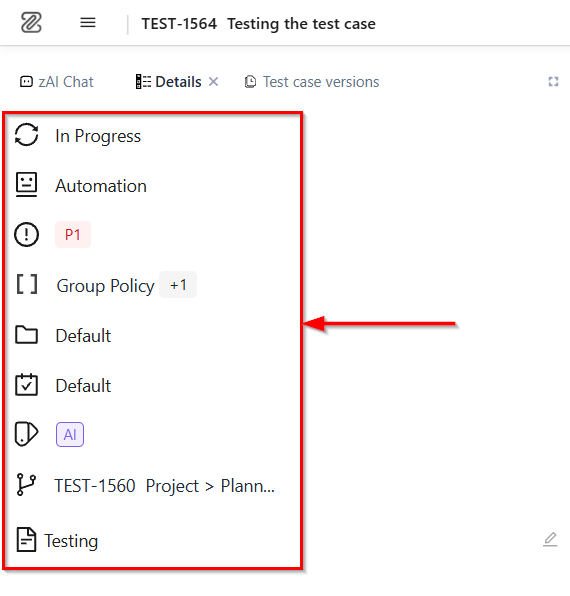
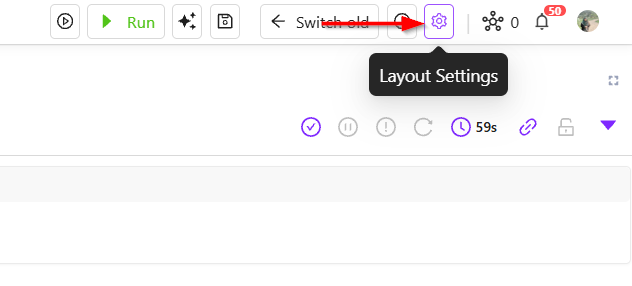
- Select the required options in the Layout Settings, then click Apply Changes. The selected options are displayed at the top of the left-side panel.
Steps Number(#): It indicates the step number. Step: The function of Step is to provide a detailed description of the actions, inputs, and expected outcomes for executing the test case.
Description: Description provides additional information or context for understanding and executing each specific test step.
To add a row above or below the current action, click Add Row Above or Add Row Below.
Duration: The function of Duration is to record the time taken to execute a specific test step, aiding in performance analysis and optimization.
- Click on the required Step.
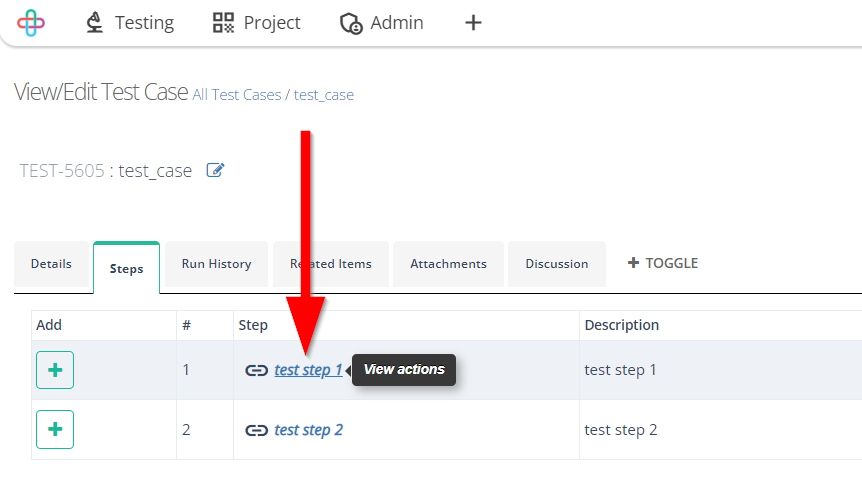
- The More menu for a test step in the Edit Test Case page of ZeuZ provides additional options for managing the selected test step, including editing its properties, managing versions and attachments, organizing actions, and performing step-level operations.
- Rename: Allows users to change the name of the selected test step. -Step Attachments: Opens the attachments